Service Principal (Certificate)
Follow these steps to enable the Microsoft Exchange Organization agent to access Exchange Online using a service principal with a certificate.
For more information see
https://learn.microsoft.com/powershell/exchange/app-only-auth-powershell-v2
- Ensure that a client certificate and private key that supports client authentication is installed on the machine running the XIA Configuration Client and that the certificate is accessible to the service account.

- Export the public key of the client certificate in CER, PEM, or CRT format.
- Logon to the Azure Portal as a user account with sufficient permissions.
- Go to Microsoft Entra ID > App Registrations > New Registration.
- Enter an appropriate name for the application - for example "XIA Configuration Exchange".
- For supported account types select
Accounts in this organizational directory only - Do not specify a Redirect URI.
- Click Register.
- Go to API Permissions.
- Click Add a permission > APIs my organization uses > Office 365 Exchange Online.
- Select Application Permissions when prompted.
- Select the following permissions
- Exchange.ManageAsApp
- Click the Add Permissions button.
- Click Add a permission > Microsoft APIs > Microsoft Graph.

- Select Application Permissions when prompted.
- Select the following permissions:
- Directory.Read.All
- Organization.Read.All
- Click the Add Permissions button.
- Click the Grant admin consent link.

- Go to Certificates & secrets > Certificates.
- Click Upload Certificate.
- Browse for the certificate and provide a description.
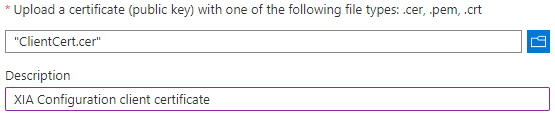
- Click the Add button.
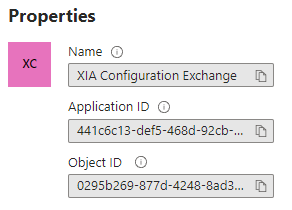
- Click Overview > Application Name under the "Managed application in local directory" header.

- Make a note of the Application ID and Object ID.
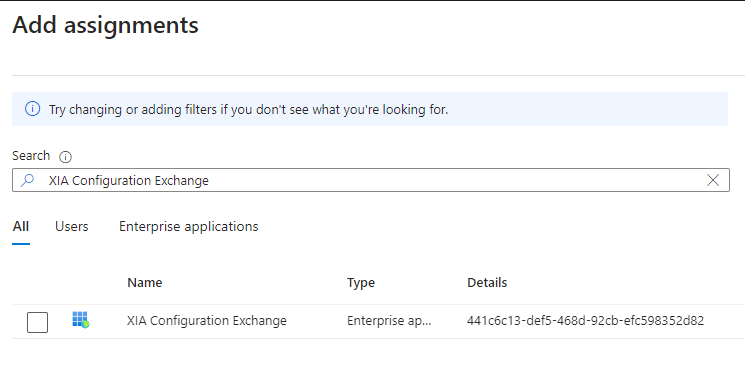
- Select Add assignments and search for the service principal that was created - for example "XIA Configuration Exchange" and click Add.
- On a machine with the Exchange Online PowerShell cmdlets installed open PowerShell and connect to Exchange Online interactively using appropriate credentials.
Connect-ExchangeOnline - Execute the following command to create a corresponding Service Principal in Exchange Online using the AppIication ID and Object ID noted above.
New-ServicePrincipal -AppId "00000000-0000-0000-0000-000000000000" -ObjectId "00000000-0000-0000-0000-000000000000" -DisplayName "XIA Configuration Exchange"
- Execute the following commands to assign the required management role assignments using the AppIication ID noted above.
New-ManagementRoleAssignment -App "00000000-0000-0000-0000-000000000000" -Role "Address Lists"
New-ManagementRoleAssignment -App "00000000-0000-0000-0000-000000000000" -Role "E-Mail Address Policies"
New-ManagementRoleAssignment -App "00000000-0000-0000-0000-000000000000" -Role "Mail Recipients"
New-ManagementRoleAssignment -App "00000000-0000-0000-0000-000000000000" -Role "View-Only Configuration"